
Necessary materials:
- a skein of satin ribbon;
- a skein of brocade ribbon;
- lace fabric;
- glue;
- scissors;
- decorative beads and feathers.
Manufacturing:
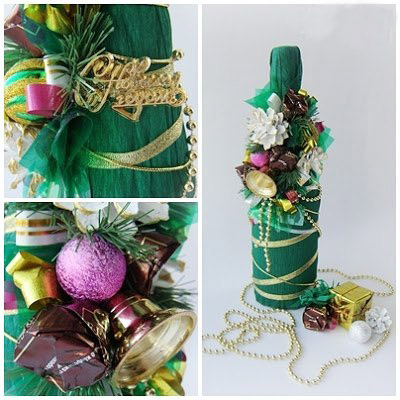
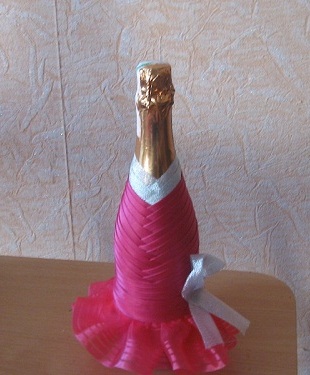
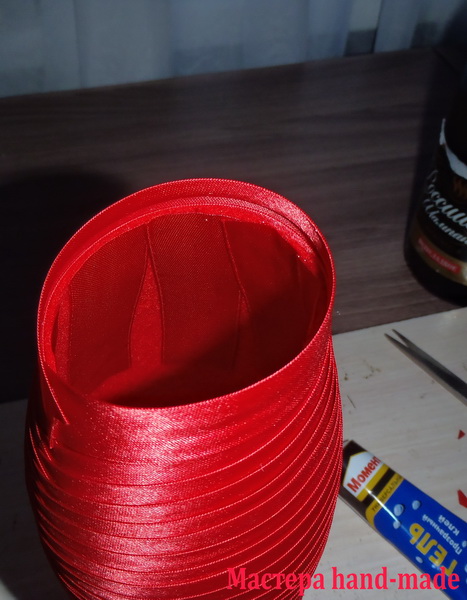
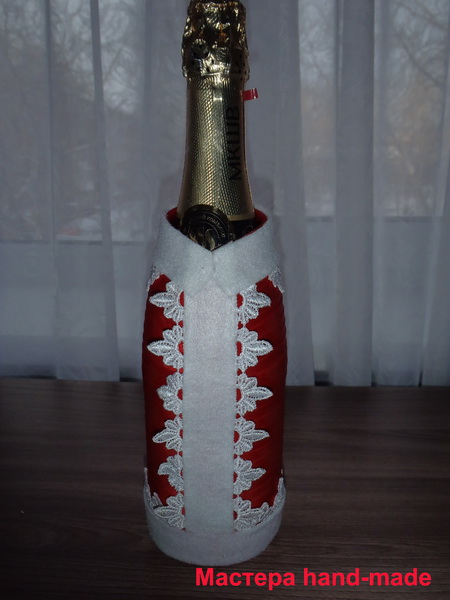
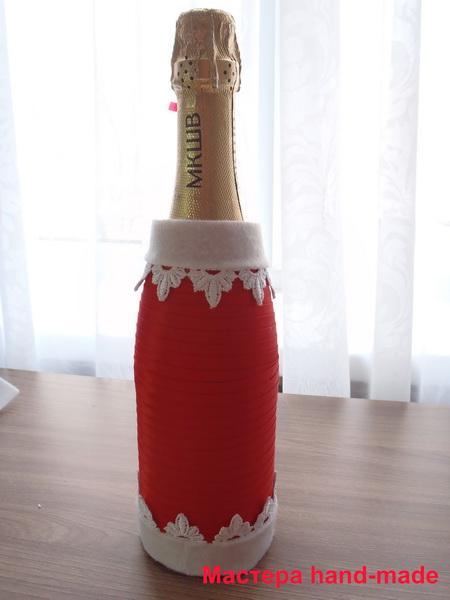
First, decorate the top tier of the bottle. To do this, wrap the base of the neck with bright satin ribbon, measure the desired length and cut the tape. We put a few drops of glue on the tape and glue it to the bottle as shown in the photo.
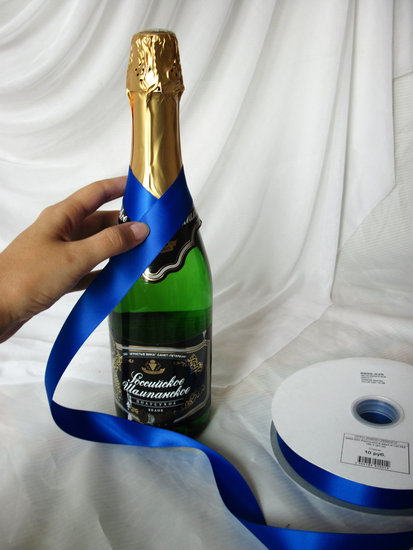
In a similar way, glue another 3-4 rows of tapes. Try to work carefully so that wrinkles do not form on the tapes, and the joints are at the same level. The next two layers are made from a shiny brocade ribbon.
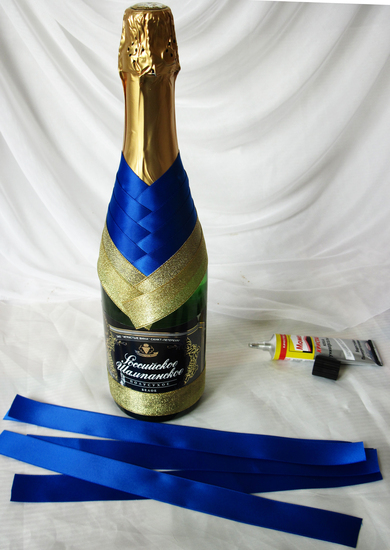
Now let's move on to the design of the bottom of the bottle. At the very base of the glass container, we glue the brocade ribbon so that the seam is at the back. Next, we cut the satin ribbon into 7-8 strips of the same length and glue them to the bottle with tension, applying one layer to another. We cover the back seam with the same tape.
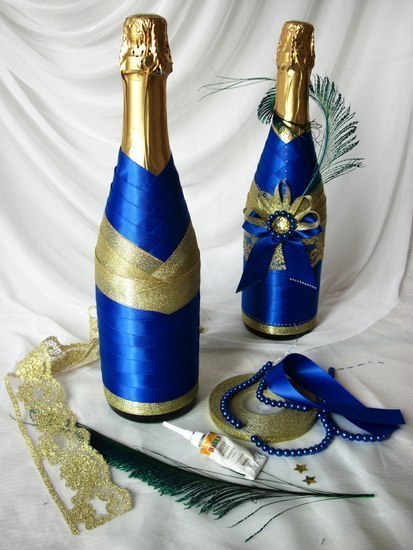
In the place where top part ribbon decor closes from the bottom, glue a wide lace ribbon to match the composition to hide all the flaws. We stick into it beautiful feather. In the center of the bottle we glue a decorative bow with beads or a flower made of fabric or corrugated paper.
Christmas tree from a bottle of champagne and sweets
Necessary materials:
- sweets in a shiny package;
- thick tinsel;
- hot glue gun;
- decorative bow and beads to decorate the Christmas tree.
Manufacturing:
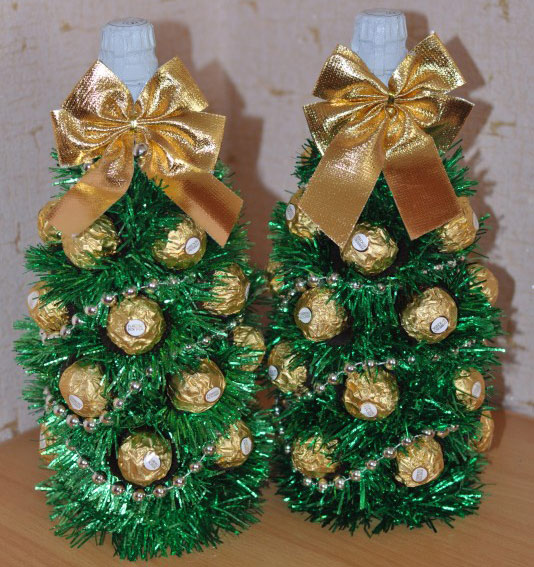
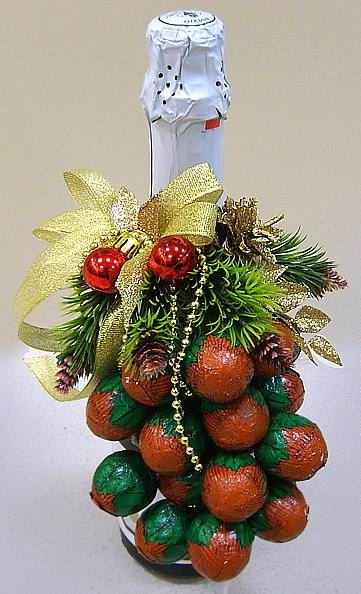
First, wrap a bottle of champagne with green tinsel. Tinsel should be wound in a spiral, moving from the neck to the base of the bottle. Glue the tinsel on hot glue. Now let's start decorating the resulting Christmas tree. To do this, we lubricate each candy with glue, after which we attach it to the bottle, slightly pushing the tinsel apart. A sweet present is ready, it remains only to glue a decorative bow to the top and decorate the Christmas tree with beads.
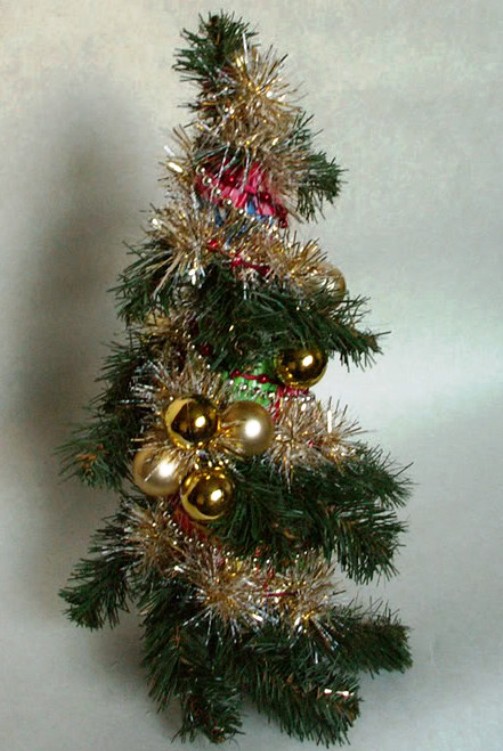
Christmas tree from a bottle of champagne
Required materials:
- thick green corrugated paper;
- scotch;
- glue gun;
- golden ribbon;
- any decorative elements (artificial flowers, bells, beads, cones, etc.).
Manufacturing:
We cut two sheets of corrugated paper - one for the neck, the second for the rest of the bottle. Carefully wrap the container in paper, fixing the wrapper with transparent tape. Next, we wrap the bottle with a thin golden ribbon, gently winding it in a spiral.
The last step is to make a decor for the resulting Christmas tree. For this we create beautiful composition from any improvised materials: New Year's toys, bells, colored cones, artificial flowers, beads, candies in a bright wrapper, etc. The main thing is that the elements used in the decor are combined with the general colors crafts. A bottle of champagne decorated in this way will be an excellent option for new year gift relatives and close people.
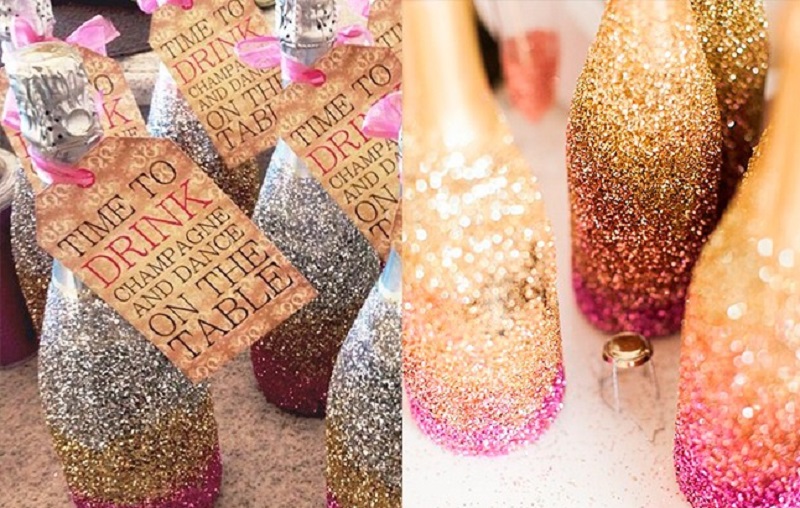
Glitter champagne bottle decoration
Necessary materials:
- glue;
- several packs of glitter;
- decorative elements.
Manufacturing:
Loose glitter decoration is truly festive and at the same time pretty simple idea to decorate a bottle of champagne. First, soak the bottle in warm water to remove factory labels. Then we generously grease the bottle with glue and roll the container in small sparkles until they cover the entire surface. As an additional decor, you can use homemade labels and a decorative bow made from a beautiful ribbon.
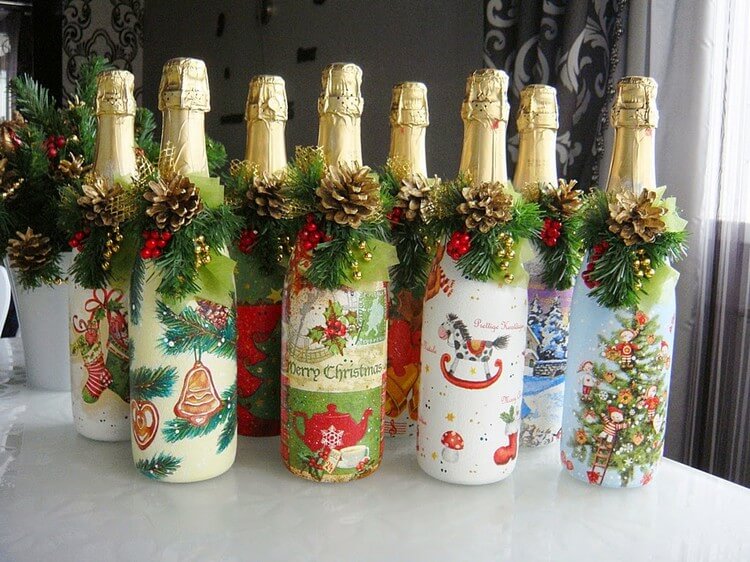
Decoupage champagne bottle decor
Necessary materials:
- napkins with a New Year's pattern;
- PVA glue;
- acrylic paints;
- acrylic clear varnish;
- sandpaper;
- scissors;
- brush;
- sponge.
Manufacturing:
First, soak a bottle of champagne in warm water to remove all labels from the surface. We paint a clean container with acrylic paint white color in several layers (the number of applied layers will depend on the hiding power of the paint used). When the paint dries, the surface of the bottle should be sanded to make it perfectly smooth.
The next step is to work with paper napkins. For New Year's decoupage the bottle will need only one layer of a napkin on which the pattern is depicted. We cut out the New Year's motifs we like and think over the location of the elements of the future composition. We attach the drawings to the bottle and apply a layer of PVA glue on top. When gluing the napkin to the glass, it must be smoothed with a spatula so that no air bubbles remain under it. When the glue dries, we go over the edges of the picture with a brush with white acrylic paint to smooth out the outlines. Next, the surface of the bottle is covered with a double layer of special varnish.
Depending on the design idea, the spaces between the drawings can be covered with a scattering of sparkles or artificial snow. The neck of the bottle can be decorated with a decorative bow or wreath made from a bright ribbon, spruce branches and cones.
Related videos
The most important attribute of each new year holiday- It's champagne. Indeed, without a bottle of champagne it is difficult to imagine a festive feast. On New Year's Eve, it is customary to raise a glass of champagne and make a wish. But with some effort, a simple bottle of champagne can be a wonderful decoration. New Year's table. And decorated champagne will become great gift for relatives and friends. Therefore, in this publication we will tell you how to decorate champagne for the new year. Here we bring you the brightest and interesting examples decorations.
How unusual and beautiful to decorate a bottle of champagne for the New Year
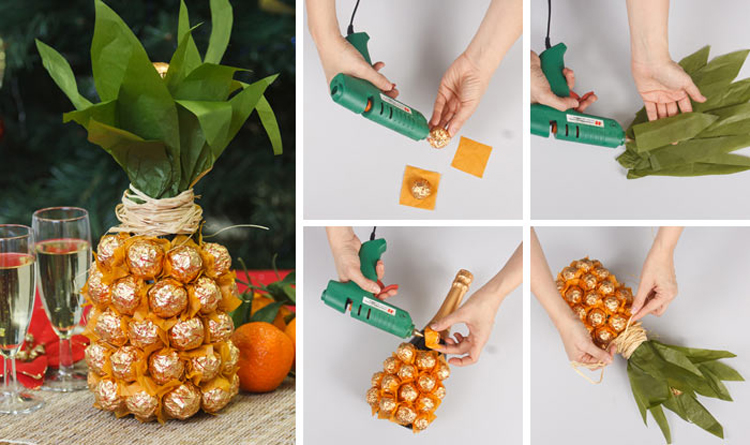
Pineapple bottle decoration.
If you do not know how to decorate a bottle of champagne for the new year, then you should pay attention to the easiest way to decorate it. Turn it into a pineapple. To decorate, prepare:
- green tissue paper that will imitate pineapple leaves;
- orange tissue paper;
- round sweets in golden foil;
- twine and glue.
Progress:
Champagne decoration with ribbons.
In this article, we decorate champagne for the new year with our own hands. Now it's time to bring you one more interesting master class champagne bottle decorations. This method is very simple in its implementation. However, your bottle will look very nice. To decorate the bottle, take:
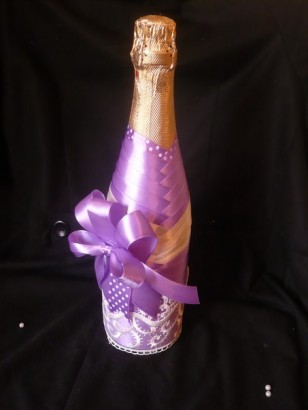
- 4 meters of satin ribbon;
- 2 meters of brocade ribbon;
- glue, scissors.
Progress:
We decorate champagne as a gift.
Above, we talked about the fact that a bottle of champagne can be a great gift in New Year. However, giving ordinary champagne is somehow not very pleasant. Therefore, try to decorate a bottle of sparkling drink in an original way. Then you will be able to make an original and pleasant gift. So, for decoration you may need:
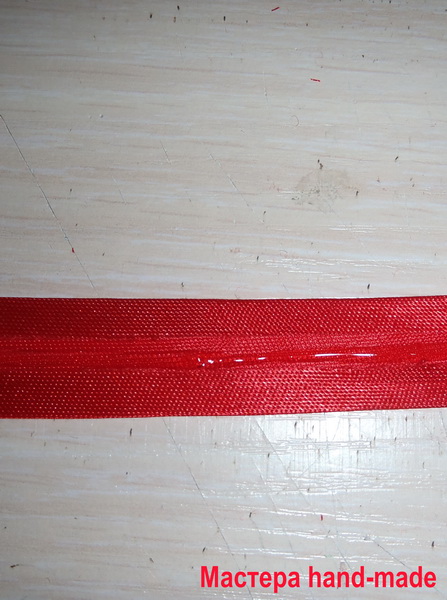
- oblique inlay (10-11 m);
- scissors, glue;
- bow fabric.
Progress:
Original decoration of a bottle of champagne.
Today, there are several ways to decorate a bottle of champagne. For next way you should prepare:
- thick aluminum foil
- medium thickness wire
- decorations. Tinsel is suitable here, small Christmas decorations, beads and ribbons.
Progress:
As a result, you will get such a beauty.
Candy bottle decoration.
This decoration not only looks beautiful. Turns out, chocolate candies You can take it off the bottle and eat it if you like. In general, try to decorate the bottle in this way and your gift will definitely remain in the memory of a person. For this craft, prepare:
- delicious chocolates,
- decorative plastic beads
- Christmas tree decoration that will have needles or a bow,
- glue gun.
How to do?
Work on gluing the bottle should start from the bottom. Move to the top of the bottle. Arrange sweets asymmetrically. If we talk about the number of sweets, then here their number is not limited. At the end of the work, attach a Christmas tree decoration to the bottle.
Festive decoration of a bottle of champagne.
Now I would like to offer you one more interesting technique decoration - decoupage. For work you will need:
- napkins with New Year's pattern,
- primer and acrylic paints,
- PVA glue,
- acrylic lacquer,
- sponge and scissors.
Progress:
Finally
In this article, we have given only a few, but the most better ways decorating champagne bottles. You can dilute our advice with your imagination and skill. As a result, you will get an interesting decoration. holiday table or a wonderful and unique gift for a loved one.
Good afternoon!
In this master class, I will tell you how to decorate champagne for the New Year. It will be a removable champagne dress, stylized as Santa Claus and the Snow Maiden.
Before, in order to decorate champagne with ribbons, I made champagne clothes not removable. But I always felt sorry that such beauty is only for one evening. I wondered how to decorate the champagne so that it could be used every year. You also need to choose a decoration that will never get bored.
And the simplest answer is Santa Claus.
So really! Why not make a detachable decoration on a bottle of champagne in the form of Santa Claus?
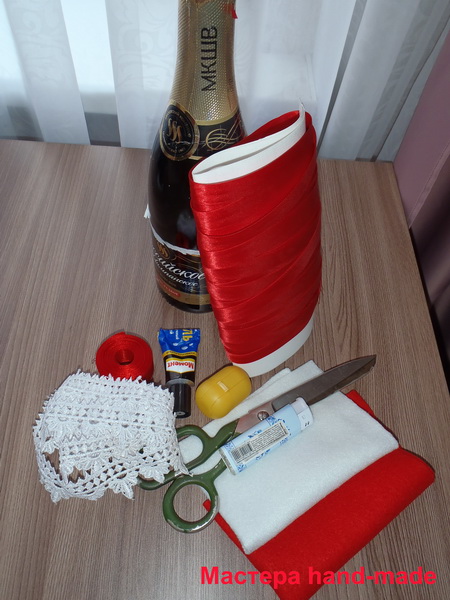
To decorate champagne, we need:
- champagne;
- red and white felt;
- pencil and ruler, lighter, scissors;
- oblique red trim 10 m;
- red ribbon width 2.5 cm - 2 m;
- lace, sequins, half beads;
- an egg from a kinder hat for Santa Claus;
- glue Moment (gel) I work only with them. You can take any other to which you are accustomed.
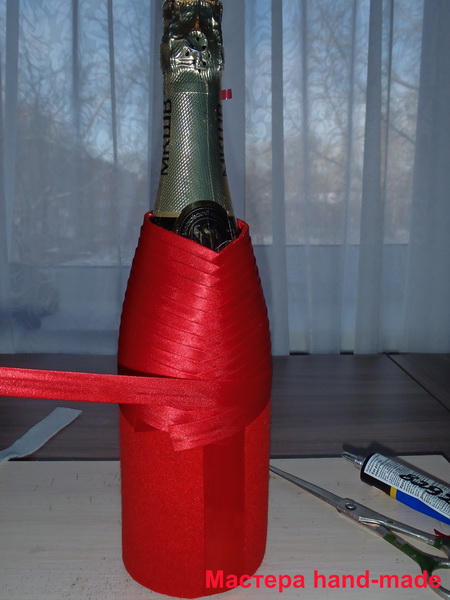
To begin with, we make a base cylinder for champagne. We take felt 20x30 cm., Such a piece of felt is just right for champagne. We try on a rectangle on a bottle and glue it, but so that the cylinder can be easily put on and removed from the bottle. I glued it with a satin ribbon butt.
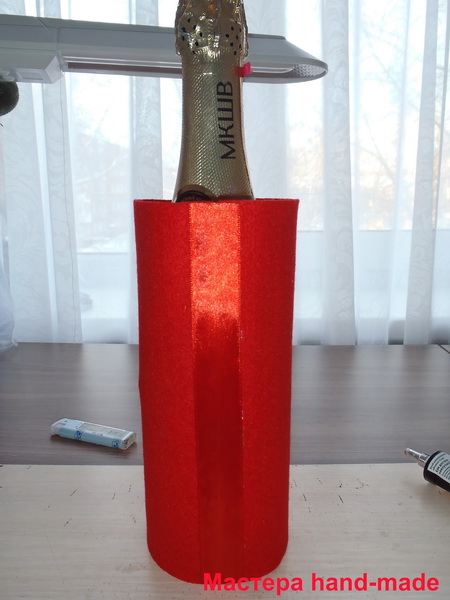
Now we make the shoulders: cut the felt vertically to the place where the bottle becomes straight. These strips were cut off on the sides on both sides (shown by the black line in the photo) so that the case turned out to be in the shape of a bottle.
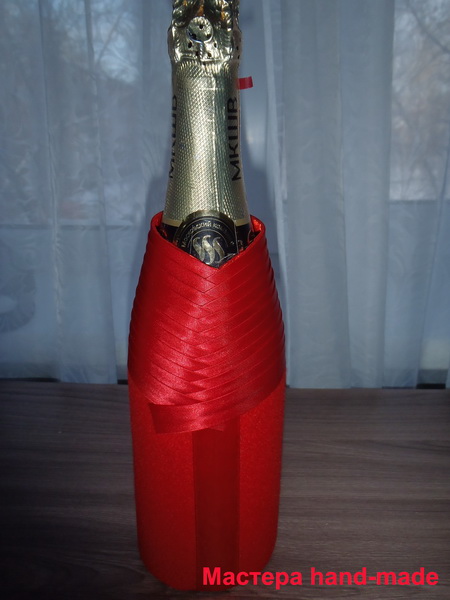
Here's the setup I got
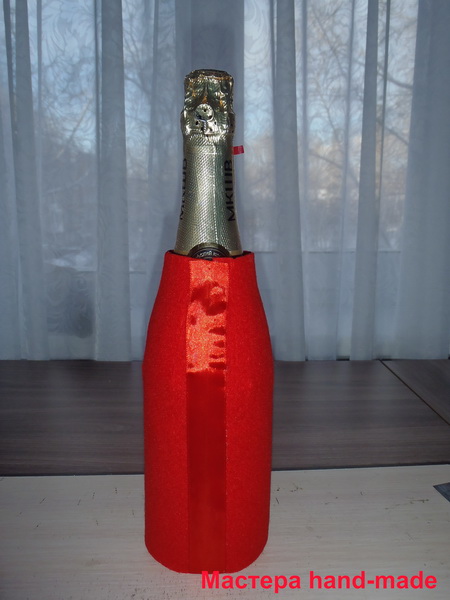
The most important thing is to do it nice shape blanks for decoration, so that it is even, easy to put on and take off. At first I made it out of paper, but tubercles remain on the workpiece and they are very clearly visible. Then it is very difficult to hide. I decided to try with felt and did not lose. It's a little more work, of course, but it's worth it. The base is flat. Another plus of felt, it stretches, if you pull the inlay a little in the process of braiding the bottle, then together with the felt you can slightly adjust the size.
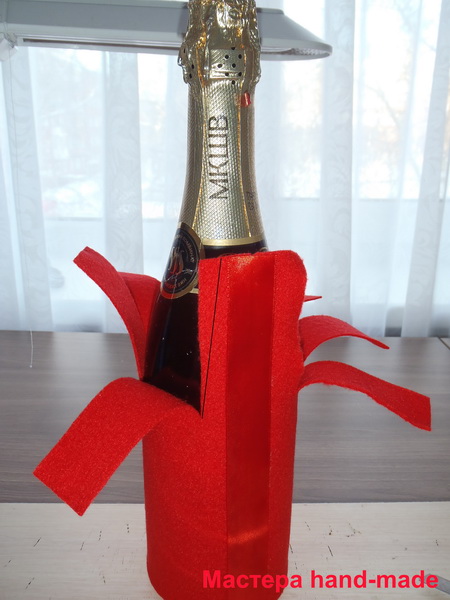
Let's start designing. We begin to braid our workpiece with an oblique inlay. Try not to pull too hard on the inlay so that the shape can be easily removed.
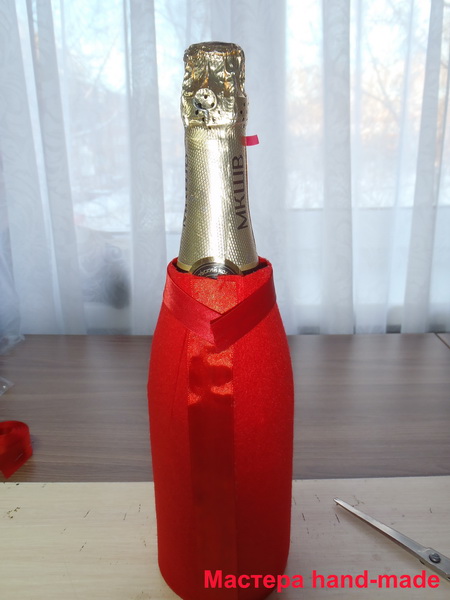
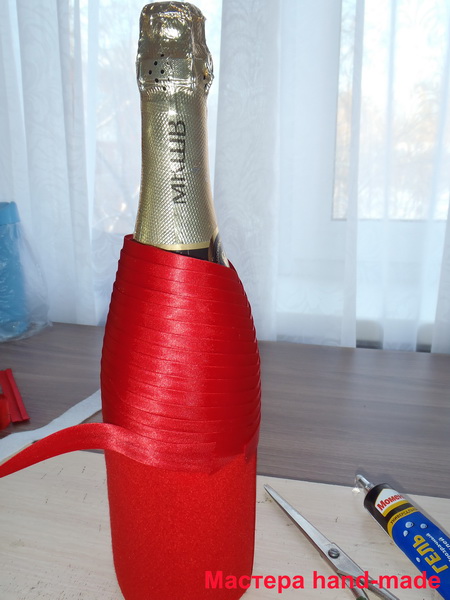
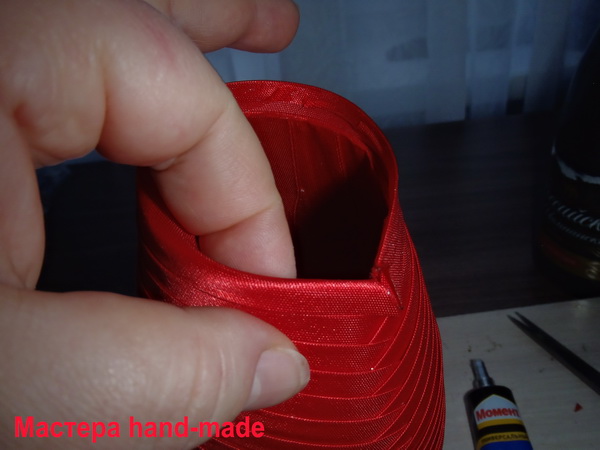
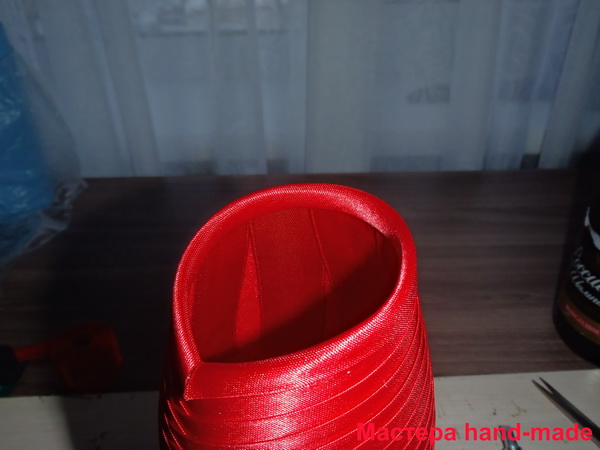
After a few strips have been glued, you can cut out the neck, then we will process it.
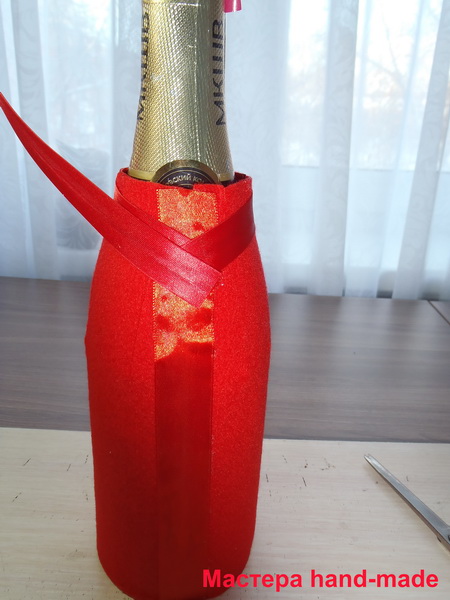
I apply glue in the middle of the bias tape so that it sticks to the felt and not to the binding. And it is so unlikely that the glue will "creep" out.
Do everything carefully, take your time, see that your inlay is glued just above the middle of the previous strip. If you want the strips to be wider, then you need to glue in the middle.
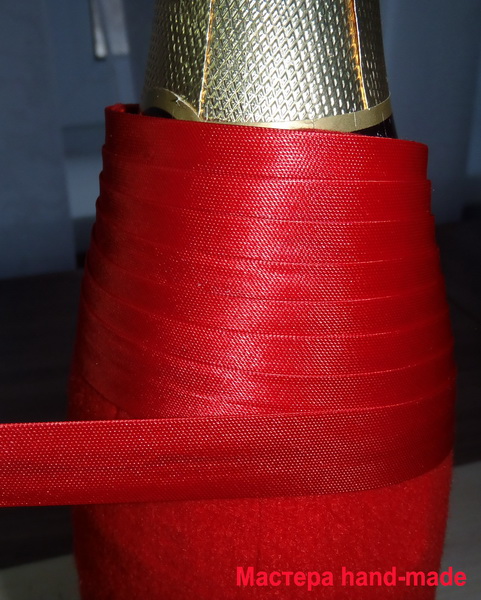
We glue the inlay to the place where the bottle becomes straight
Why do I like to use bias binding? Because it fits well, it doesn’t “bulge out”, so it’s much more difficult to work with ribbons.
I glue with Moment Gel glue, applying it over the entire strip. Many use Titan glue or its analogues. You already decide for yourself which glue is more convenient for you to work with or which glue you are used to.
![]()
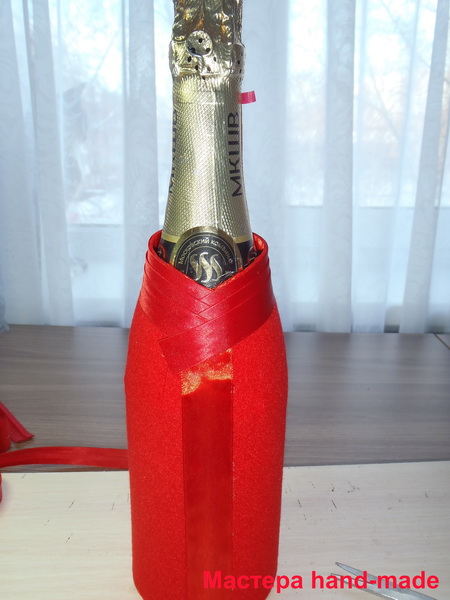
We will process the collar with the same, oblique trim.
And now the most interesting and pleasant - we create the image of Santa Claus.
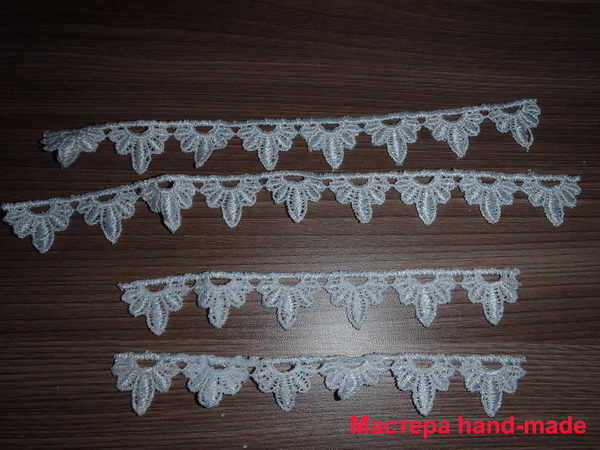
We cut off strips of white felt 2.5 cm wide. There should be three of them: on the neck, on the bottom and on the front (where the buttons will be).
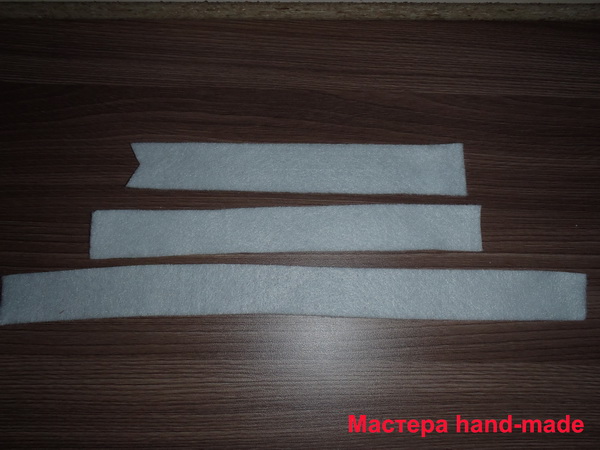
We cut off strips of lace along the length equal to the pieces of felt, on the front you need two strips of lace, because. the frill will be on both sides. In general, there should be 4 strips
I first glued the lace to the felt. And then I glued the felt on the bottle.
First of all, we glue the bottom, then the vertical strip, and then the collar.
This is how Santa Claus's clothes look from behind.
We make a hat from an egg from a Kinder. We glue the larger half with an inlay, decorate with a strip of white felt and a half-bead. You can also make a felt hat. It is easy to make. We take a piece of red felt 12x5 cm, sides 5 cm. Sew vertically overlap or glue. We collect the upper cut on a thread and sew a pompom from yarn, it is possible without it. We decorate the lower cut with white felt.
Now we make buttons: we glue sequins in the form of snowflakes, and half beads on them. The buttons are ready.
Christmas decoration for champagne "Santa Claus" is ready.
